When cycling with an indoor bike you will have seen that the pedal usually has one side where you insert the shoe -with an adjustable strap- and another side with a metal attachment. This type of pedal is known as mixed pedals, and the metal attachment is where the cleat of the cycling shoe is attached. The cleat and cycling shoe system is very useful for getting the most out of your bike, as well as improving your pedaling. However, it is essential to place it correctly to enjoy its benefits, and as we know that this can generate doubts, in this article we explain everything you need to know about it. Let’s get to it!
Advantages of cleats over the traditional pedal
The use of cleats in cycling offers several advantages over traditional pedals. The main one is greater pedaling efficiency, as they allow you to apply force both when pushing and pulling the pedal (round pedaling), optimizing power transmission. In addition, they improve stability and control, as they secure the foot in the correct position, and this also reduces the risk of injury. On the other hand, they increase comfort over long distances and facilitate a smoother and more constant cadence, avoiding inefficient movements. Of course, cleats require practice to get used to them, but once mastered, they significantly improve the cyclist’s performance and safety.
Types of cycling cleats
Cleats can be of various types, depending on whether they are for mountain bikes or road bikes, and also depending on the type of pedal, as you can read in this article. The choice between one or the other will depend on the pedals that your bike has; now, if you use an indoor cycling bike, the most common is that it integrates a cleat system for mountain, as is the case of ZYCLE indoor bikes. And one of the most popular brands is Shimano SPD which, in turn, offers two different models (both useful for this type of clipless pedals):
- Shimano SH51 cleats: These are the most common and are characterized by their black color. These are considered single or lateral release.
- Shimano SH56 cleats: They have the advantage of being released in multiple directions, either sideways, upwards or diagonally. They are designed for cyclotourism, initiation cycling or even urban cycling. They are gray/silver in color.
How to put cleats on cycling shoes and adjust them correctly
When it comes to putting cleats on shoes, the first thing to keep in mind is that they should match the angle your feet naturally adopt. To do this, you can see the natural posture of your feet by sitting in a place that allows you to leave your legs dangling. If you notice, for example, that the heel points inward, then the cleat should also point in that direction. Note that cycling shoes have two horizontal slots in the center that allow us to position the cleat base higher or lower, but also that the cleat itself offers a degree of oscillation that allows us to adjust the engagement to one side or the other. Therefore, to answer how to put cleats on shoes, we recommend that you follow the steps below:
1. Prepare your tools
That is, Shimano SPD cleats, a screwdriver (usually an Allen screwdriver) and cycling shoes compatible with SPD cleats.
2. Locate the cleat holes
Cycling shoes often have several cleat hole options, allowing you to vary the position of your foot. Identify which holes are available and locate the markings or indications for cleat placement.
3. Align the screws
Shimano SPD cleats have two anchor points. Place the cleat on the front of the sole, aligning the holes in the cleat with the holes in the shoe. Then place the screws through the holes in the cleat and the holes in the shoe. Do not overtighten so that position adjustments can be made.
4. Adjust the cleats to the correct position
5. Tighten the screws
Use a screwdriver or Allen wrench to tighten the screws. Do not overtighten, as this may damage the shoe or cleat. Make sure the cleats are securely fastened.
6. Check the position and fit
Finally, check that the cleats are in the correct position, without moving or being twisted. Try on the shoes and adjust the cleats if you feel that the position is not comfortable or does not align well with your foot posture when you clip them on the bike.
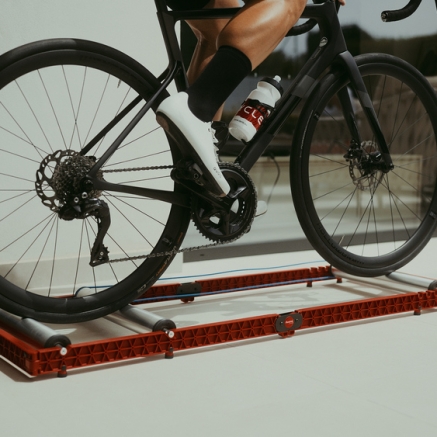
How to attach cleats to the bicycle pedal

And last but not least, we need to talk about how to attach the cleats to the pedal. If it’s the first time you do it, you may feel that they don’t fit, but the truth is that they do. To attach cleats to pedals, first of all, get on your bike and lower the pedal on your right foot. Then feel with your shoe where the cleat is. Once identified, insert the top part of the cleat, with the heel slightly tilted upwards, and when you feel that it is in the right place, leave your weight on the pedal so that the cleat will fit. You will hear a click. The process to remove the SPD cleat from your indoor cycling bike is very simple. All you have to do is make a firm movement to the outer side, and you’re done!